Virtual Appliance: UDA 2.0 Beta


image 

These are the new features in UDA 2.0:

 
  • ESX4 Support
    Thanks to Mike Laverick!
  • Solaris Sparc Support
    Thanks to Bevan Brown and his team for sending in the solaris sparc details.
  • Based on Centos 5.3
    The UDA is now based on an enterprise ready Linux distribution.
  • First Boot Wizard
    Turn on the appliance and it will run a wizard that lets you configure the UDA before it tries to access the network.
  • Improved User Interface
    Well, that’s personal of course, just check it out and let me know what you think!
  • Operating System Flavors
    You can now add as many operating system flavors as you want. Many people on the forums asked about how to get e.g. Windows XP Home and Windows XP Professional on the UDA at the same time. It was possible by changing/remounting the ISO files and some manual fiddling, but now you can add as many as you like.
  • Subtemplates
    You can now specify a list of variables and values and use them all within the same template. You will not have to add a new template for every new system anymore. (You’ll need documentation to use this, but that is not ready yet 🙂
  • PXE password
    If you are using the UDA in an environment where you do not want all users to have access to the templates using PXE boot, you can use a menu password.
  • Mounting 256 ISO files
    On the forums we’ve seen people having troube with a ‘no free loop devices’ error. This was caused by the UDA not having enough reservations for mounting ISO’s. You can now mount up to 256 iso files at the same time.
  • Add VMware Tools from the web-interface
    Tell the UDA where your linux.iso file is containing the vmware tools and it will install them for you.
  • Manual Configuration
    Lots of people were creating their own additions for bootable floppies over PXE. Good stuff that would break when the UDA regenerated the boot menu. Now you can manage your manual configuration from within the web-interface (and they will stay on the menu :-).
  • Easily extend diskspace
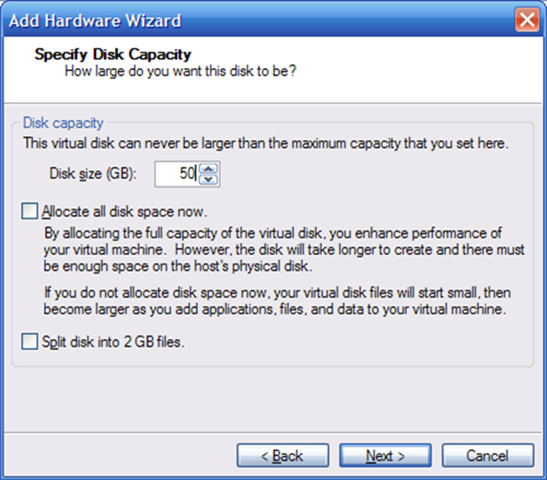
    Extend the space for the local storage or the UDA system volume by adding as many virtual disks as you like. Use the webinterface to activate the new disks
  • Use the CDROM station(s) in the UDA virtual machine
    You can now add a cdrom drive to the UDA virtual machine and it will detect it.
  • More info and the latest version can be found here: http://www.ultimatedeployment.org/uda20beta.html

    Advertisement

    How To: Install MGE Network Shutdown Module V3 within the Service Console of ESX 3.0.x


    Deze post is ook als pdf geplaatst op www.vmug.nl

    De software die je nodig hebt is de Network Shutdown Module Linux x86 Console.

    Download de software hier: http://www.mgeups.com/.

    Verder vindt je hier een Whitepaper: http://www.mgeups.com.

    Zodra alle Software binnen is kunnen we beginnen.

    Continue reading “How To: Install MGE Network Shutdown Module V3 within the Service Console of ESX 3.0.x”

    UDA: Ghost image deploymend through PXE


    Een post van tsyko in het udaforum: http://www.ultimatedeployment.org/forum/ vondt ik hoe eenvoudig het was:

    1. You need to use a program called WINIMAGE to modify ghost.dsk so that it thinks it is a 2.8mb disk.
    2. I ssh into the UDA machine and edit /var/public/tftproot/pxelinux.cfg/default
      and add
      label ghost
      kernel GHOST\kernels\memdisk
      append initrd=GHOST\images\ghost.dsk

    3. then you need to edit /var/public/tftproot/messages.txt
      and add
      ghost Norton Ghost PXE Boot
    4. Download this zip file
      http://www.lhsc.vic.edu.au/Downloads/pxeghost/PXEGhost.zip
      and extract the contents into /var/public/tftproot/GHOST
    5. place the modified ghost.dsk into the /var/public/tftproot/GHOST/images folder

    Zodra je nu een PC opstart via PXE, krijg je het onderstaande menu.

    udascreen

    How To: Migrate from VMware ESX 2.5.x to VMware VI3


    Omdat ik zelf bezig ben met het migreren van VMware ESX 2.5.4 naar VI3, dacht ik dat het wel handig was om mijn stappen plan te posten.

    Stappenplan

    1. Inventarisatie maken van de huidige omgeving.
    2. Een back-up maken van de oude VC 1.x Server.
    3. De VC 1.x Server deïnstalleren.
    4. VC 2.0.2 installeren en configureren.
    5. Back-up maken van alle VM’s.
    6. Server / SAN hardware bijwerken met de nieuwe firmware en bios updates.
    7. Een ESX 3.0.1. server opbouwen die beschikking heeft over een VMFS3 lun.
    8. Binnen alle Windows VM’s alle partities defragmenteren.
    9. De VM’s clonen of via DMotion overzetten naar een ESX 3.0.1 server met een VMFS3 lun.
    10. De Virtuele Hardware van de VM’s upgraden naar VI3.
    11. VMware Tools upgraden op de bijgewerkte VM’s
    12. De overige ESX Servers opnieuw installeren met ESX 3.0.1. (bijvoorbeeld via UDA).
    13. De “nieuw” geïnstalleerde ESX Server configureren in VirtualCenter
    14. De overige VMFS2 Luns upgraden naar VMFS3.
    15. De configuratie van de ESX3 Servers nalopen aan de hand van je inventarisatie van stap 1.
    16. De VMs terug clonen of via VMotion terug plaatsen.
    17. De verschillende logfiles binnen de VI3 omgeving nakijken.

    Het stappenplan zal ik nu nader beschrijven. Tevens vindt je zo nu een dan een verwijzing naar een andere blogpost.

    Continue reading “How To: Migrate from VMware ESX 2.5.x to VMware VI3”

    UDA: How to install the IBM ASM Driver (RSA II)


    Via het volgende document Installing the RSA II daemon on VMware ESX Server 3 vindt je hoe je de ASM driver installeerd binnen het Service Console van VMware ESX.

    Ik heb het onderstaande scriptje in de %post geplaatst van mijn config.ks script binnen UDA 1.4

    ## Install the ASM Driver

    # install libusb
    rpm -ivh /vmfs/volumes/iso/rsa2/VMWARERPM/libusb-0.1.6-3.i386.rpm
    rpm -ivh /vmfs/volumes/iso/rsa2/VMWARERPM/libusb-devel-0.1.6-3.i386.rpm

    # install ibmusbasm
    rpmbuild –rebuild /vmfs/volumes/iso/rsa2/SRPMS/ibmusbasm-1.37-2.src.rpm

    cd /usr/src/redhat/RPMS/i386
    rpm -ivh ibmusbasm-1.37_rhel3-2.i686.rpm

    De installatie bestanden heb ik op mijn NFS-Share geplaatst. Deze NFS-Share staat op mijn VirtualCenter Server. Via het service console ben ik toen naar het volume gegaan: cd /vmfs/volumes/iso/rsa2 daarna heb ik het tgz bestand uitgepakt met het commando: tar zxvf ibm_svc_rsa2_hlp237a_linux_32-64.tgz.

    Daarna moet je nog een tweetal rpms vanaf de VMware ESX CD-Rom kopieren:

    • libusb-0.1.6-3.i386.rpm
    • libusb-devel-0.1.6-3.i386.rpm

    deze plaats je in de map VMWARERPM.

    ASMDriverUDA

    De voorbereidingen zijn klaar. Het installeren zou nu volledig automatisch moeten gaan.

    UDA: How to Install VMBK.pl


    prerequirements

    Op de NFS Share maak je de volgende twee mappen aan: config en cron. In de config map plaats je de custom config file welke je al gemaakt had voor het gebruik van VMBK. Dit geld ook voor de cron map.

    Mocht je voor het eerst bezig zijn met VMBK dan raad ik je aan de volgende post te lezen: vmbk backup with different session names.

    vmbkwithuda

    Nadat je de mappen hebt aangemaakt voeg je de vmbk3.0.0rev11.tar.gz en het script vmbkinstall.sh toe.

    Scripts

    %post script

    Voordat je het script kunt uitvoeren moet de NFS share iso eerst gemound worden. Dit gaat met het volgende commando:

    esxcfg-nas -a iso -o vcserver.domain.nl -s iso

    Vervolgens dien je op de firewall van ESX port 25 te openen.

    esxcfg-firewall -o 25,tcp,out,SMTP

    Daarna wordt het onderstaande script uitgevoerd.

    ## Install VMBK on ESX3.0.1.
    # This little script installs VMBK3.0.0. rev 11 within the %post script from UDA
    cp /vmfs/volumes/iso/vmbk/vmbkinstall.sh /tmp
    cd /tmp/
    chmod 755 vmbkinstall.sh
    touch vmbkinstall.sh
    ./vmbkinstall.sh

    Waarna als laatste de vmbkinstall.sh wordt aangeroepen. Dit script installeerd en configureerd VMBK.

    vmbkinstall.sh

    ## Install VMBK on ESX3.0.1.
    # This little script installs VMBK3.0.0. rev 11 within the %post script from UDA

    ## Copy the tar file from nfs:iso to /tmp
    cp /vmfs/volumes/iso/vmbk/vmbk3.0.0rev11.tar.gz /tmp
    cd /tmp/
    tar zxf vmbk3.0.0rev11.tar.gz
    cd vmbk/

    ## Install VMBK
    ./install.sh

    ## Copy Config file
    cp /vmfs/volumes/iso/vmbk/config/vmbk-all.conf /usr/local/bin

    Cronjob

    Voeg de onderstaande code toe aan je %post script

    touch /tmp/vmbkcron.txt
    chmod 755 /tmp/vmbkcron.txt

    cat <<EOF > /tmp/vmbkcron.txt
    30 20 * * 1 /usr/local/bin/vmbk.pl -C /usr/local/bin/vmbk-all.conf > /dev/null 2>&1
    30 20 * * 2 /usr/local/bin/vmbk.pl -C /usr/local/bin/vmbk-all.conf > /dev/null 2>&1
    30 20 * * 3 /usr/local/bin/vmbk.pl -C /usr/local/bin/vmbk-all.conf > /dev/null 2>&1
    30 20 * * 4 /usr/local/bin/vmbk.pl -C /usr/local/bin/vmbk-all.conf > /dev/null 2>&1
    30 20 * * 5 /usr/local/bin/vmbk.pl -C /usr/local/bin/vmbk-all.conf > /dev/null 2>&1
    30 20 * * 7 /usr/local/bin/vmbk.pl -C /usr/local/bin/vmbk-all.conf > /dev/null 2>&1
    EOF

    crontab /tmp/vmbkcron.txt

    How to: Install VMware tools on the UDA VA


    fedoracore5

    In deze post lees je hoe je de VMware Tools installeerd in de UDA virtual Appliance die gebasseerd is op Fedora Core 5.

    De voorbereiding:

    De Kernel bijwerken:

    voordat je de kernel kunt bijwerken dient de uda vm een werkende internet verbinding te hebben. Ik heb het geïnstalleerd zonder proxy server. Zodra je internet hebt binnen de VM kunnen we beginnen.

    uname -a

    yum update kernel kernel-devel

    reboot -n

    GCC installeren:

    yum install gcc

    CD-Rom drive toegoegen aan de UDA VM:

    installvmwaretools_uda1

    VMware Tools installeren

    Start de installatie van de VMware Tools via het menu: VM – Install VMware Tools.

    installvmwaretools_uda

    Vervolgens moet je de CD-Rom mounten. Weet je niet welk device je CD-Rom speler heeft meegekregen, dan kun je dit achterhalen met het volgende commando: dmesg | grep “CD” als het goed is krijg je de onderstaande uitkomst:

    hda: VMware Virtual IDE CDROM Drive, ATAPI CD/DVD-ROM drive
    Uniform CD-ROM driver Revision: 3.20

    Nu je het devicenaam weet (hda), kun je de CD-Rom mounten met de volgende commando’s:

    mkdir -p /media/cdrom

    mount /dev/hda /media/cdrom

    Nu de CD-Rom gemount is kan het installatie bestand gekopieerd worden naar de /tmp directory

    cp /media/cdrom/VMwareTools-6.0.0-45731.tar.gz /tmp

    Daarna pak je het tar.gz bestand uit

    cd /tmp

    tar zxvf VMwareTools-6.0.0-45731.tar.gz

    En als laatste stap installeren we de VMware tools

    cd vmware-tools-distrib

    ./vmware-install.pl

    Nadat je een paar keer enter hebt gegeven is de installatie klaar. Ik zou voor de zekerheid nog even de VM herstarten. Dit doe je met het volgende commando

    reboot -n

    How To: Install iSCSI Enterprise Target (IET) on FC5 (UDA VA)


    In deze how to lees je hoe je de iSCSI Enterprise target installeerd op Fedora Core 5 wat als basis dient voor de UDA 1.4 virtual appliance.

    Als eerste moet de kernel bijgewerkt worden. Dit doe je als volgt

    uname -a

    yum update kernel kernel-devel

    reboot -n

    Vervolgens dien je gcc en openssl-devel te installeren. Deze twee pakketjes zijn nodig voor de installatie van iSCSI Enterprise Target. Doe je dit niet dat loopt de installatie vast met een foutmelding.

    yum install gcc

    yum install openssl-devel wget

    Als laatste stap in de voorbereiding download en pak je de iSCSI Enterprise target uit.

    http://belnet.dl.sourceforge.net/sourceforge/iscsitarget/iscsitarget-0.4.15.tar.gz

    tar xvfz iscsitarget-0.4.15.tar.gz

    Nu beginnen we met de installatie


    cd iscsitarget-0.4.15
    export KERNELSRC=/usr/src/kernels/2.6.20-1.2320_FC5-i686
    make && make install

    cp etc/ietd.conf /etc

    Voeg een extra VMDK toe aan de UDA VM.

    image

    edit de ietd.conf file en voeg de onderstaande tekst toe om zo de derde vmdk beschikbaar te stellen als iscsi target.

    nano /etc/ietd.conf

    Target iqn.2007-07.local.uda:storage.disk1
    Lun 0 Path=/dev/sdc

    Alias iSCSI

    MaxConnections 8
    InitialR2T Yes

    De iSCSI service herstarten

    /etc/init.d/iscsi-target start

    De iSCSI service zo configureren dat deze automatisch start bij het starten van de VM.

    chkconfig iscsi-target on

    Vanaf nu kun je de iscsi target benaderen via de Windows client of via VI3.