VMware: Export a VM from VirtualCenter to VMware Workstation


Nu de VMware Converter Enterprise is ingebouwd in VirtualCenter 2.5 is er een leuke feature bijgekomen. Je kunt nu een Export doen van een VM die in je VirtualCenter server geregistreerd staat.  Hoe dit in zijn werk gaat lees je hier.

Let Op! deze feature kun je alleen gebruiken als de target VM uitstaat.

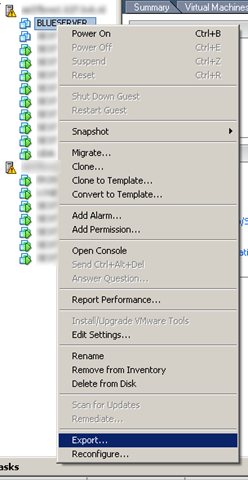
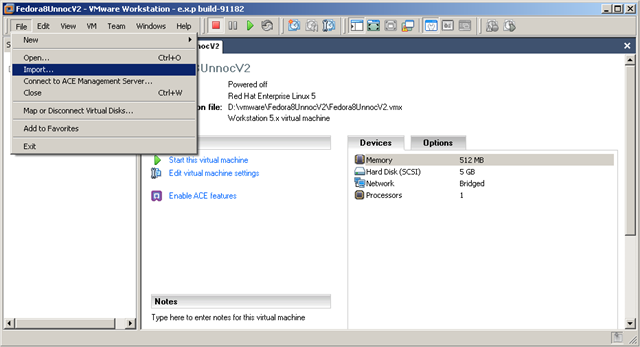
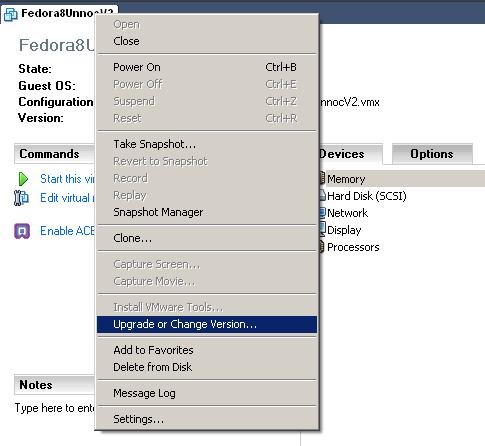
Sluit de target VM netjes af. Klik rechts op de VM en kies de optie ‘Export…’

Export_VM_From_VC25_1

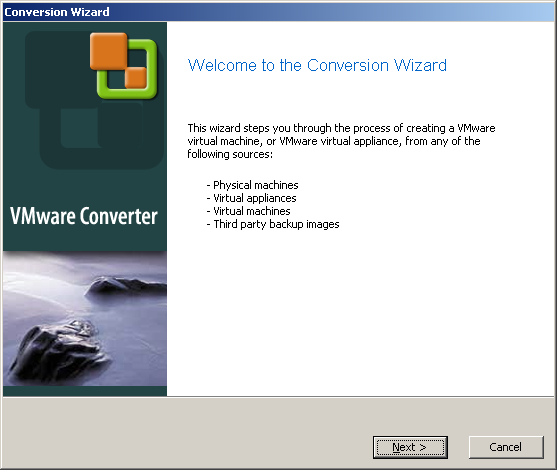
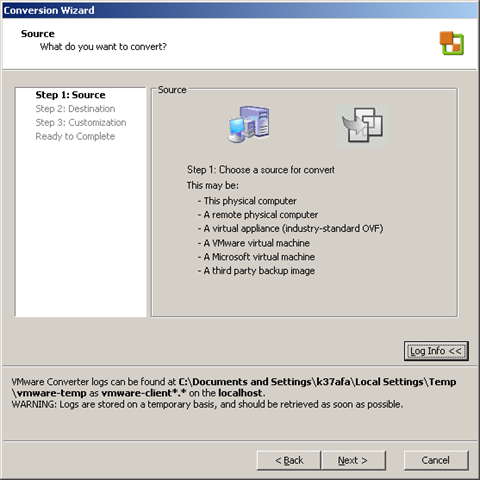
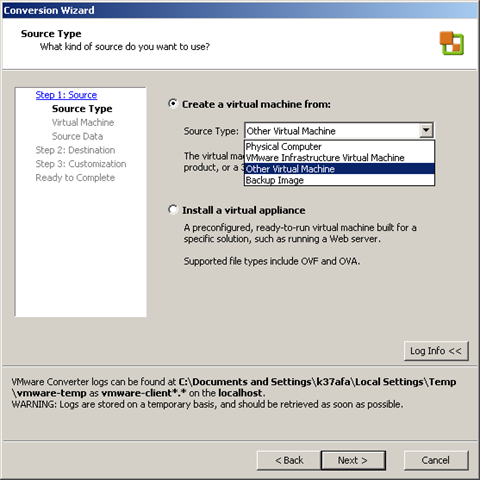
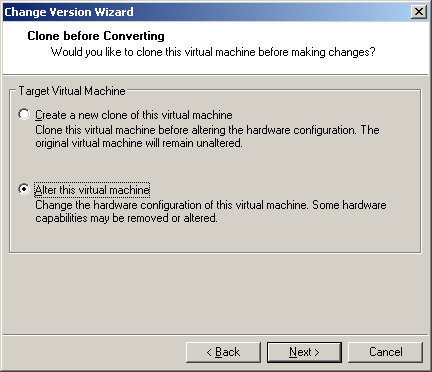
De volgende wizard wordt gestart.

Export_VM_From_VC25_2

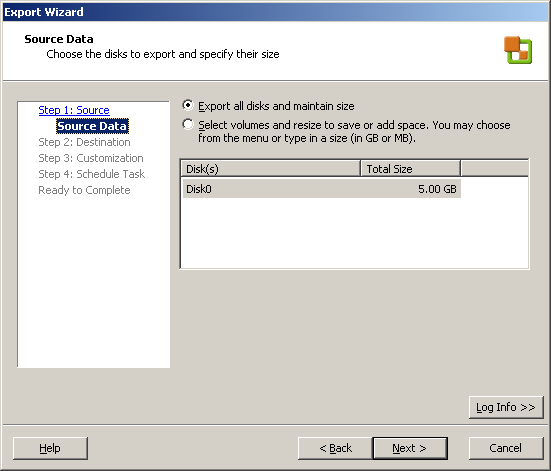
In het onderstaande scherm kun je de grootte van de VMDK opgeven. Hier kun je deze dus vergroten of verkleinen.

Export_VM_From_VC25_3

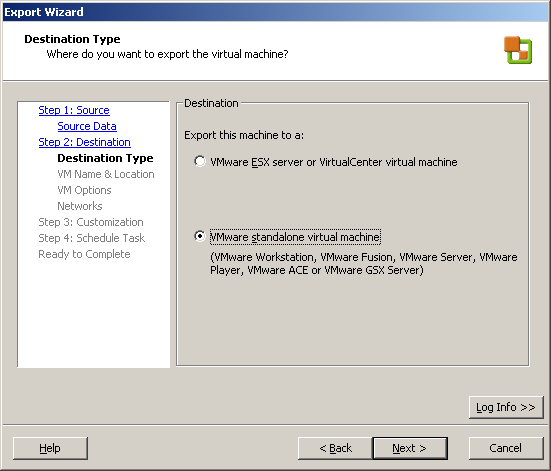
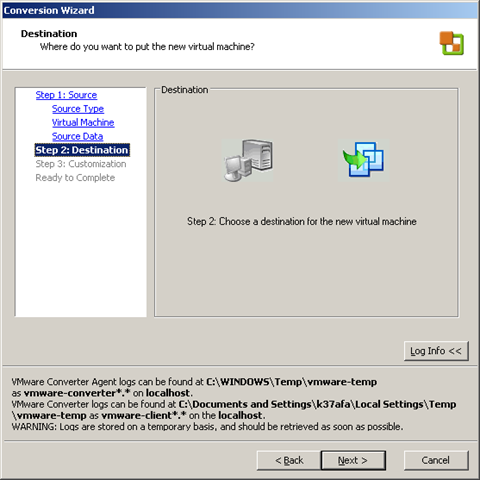
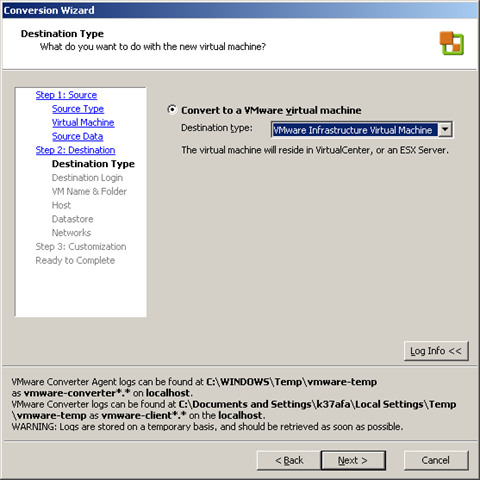
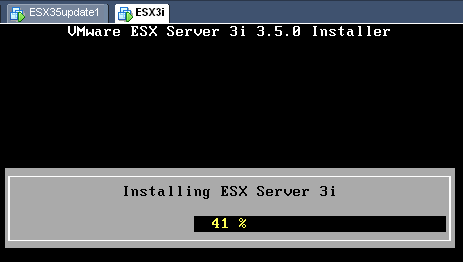
Ik wilde de VM exporteren naar mijn laptop. Dus kies hier voor ‘VMware standalone virtual machine’. Je kunt er ook voor kiezen om de VM over te zetten naar je test ESX omgeving. Kies dan voor ‘VMware ESX server or VirtualCenter virtual machine’.

Export_VM_From_VC25_4

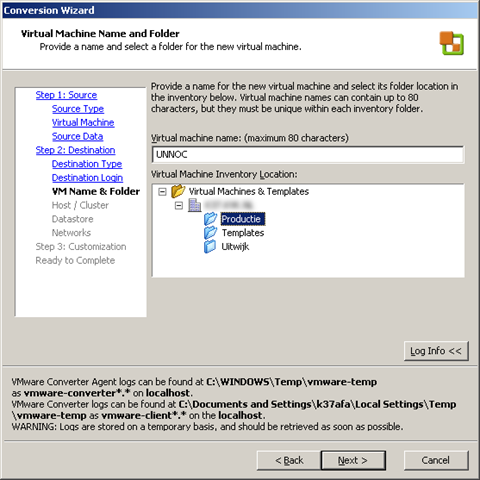
Geef de VM een naam. Voer de locatie in. Dit moet een share zijn die te benaderen is door de VMware Converter. Geef vervolgens een username en password op van een user die rechten heeft op de share. Als laatste geef je de type op. Ik kies voor portability dus voor ‘Workstation 5.x….’

Export_VM_From_VC25_5

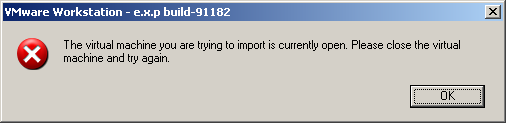
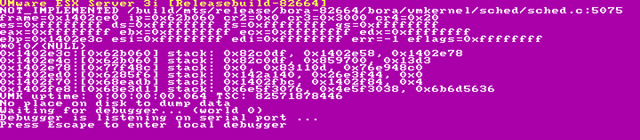
Het kan zijn dat je de onderstaande foutmelding krijgt:

Export_VM_From_VC25_error

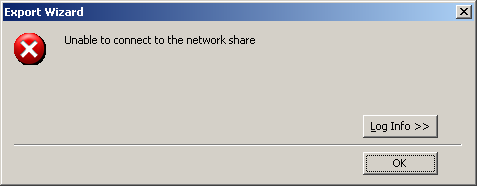
Dit kan komen door de (Windows) Firewall. Schakel deze tijdelijk uit en de wizard zal succesvol doorlopen.

Geef nog even aan wat je wilt qua ‘Disk Space Allocation’.

Export_VM_From_VC25_6

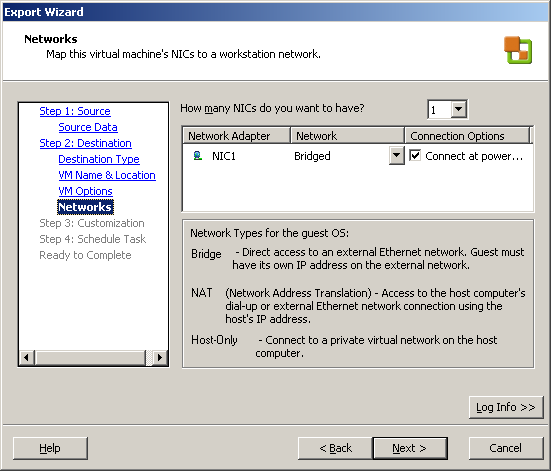
Doe dit ook voor je netwerk instellingen

Export_VM_From_VC25_7 

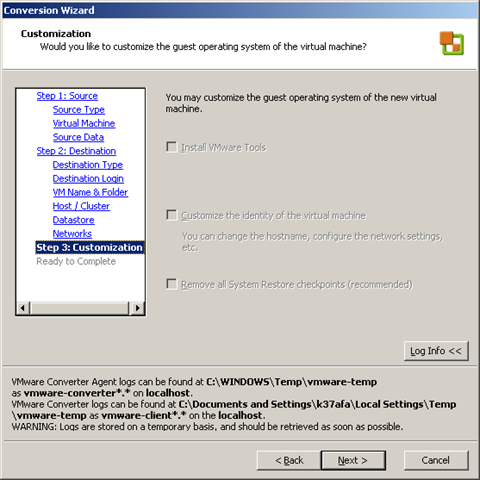
Je kunt er voor kiezen om de ‘identity’ van de VM aan te passen. Ik doe dit echter niet.

Export_VM_From_VC25_8

In de laatste stap kun je er voor kiezen om er een scheduled task van te maken.

Export_VM_From_VC25_9

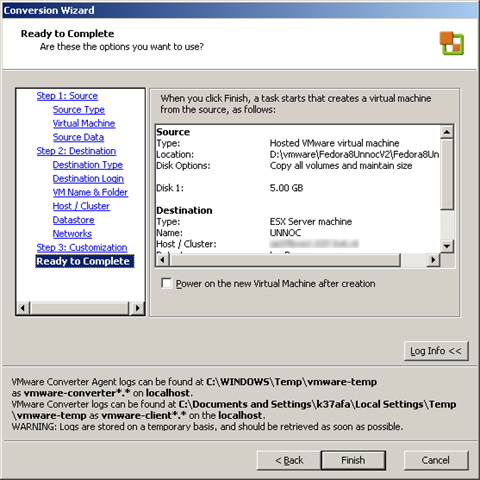
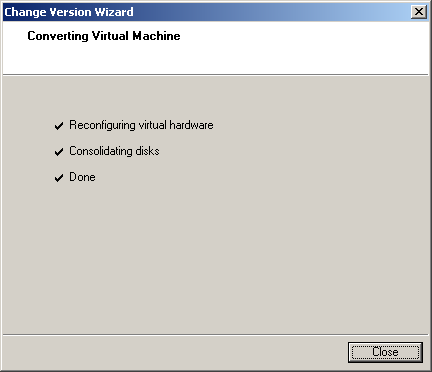
Nog even een overzicht van de instellingen

Export_VM_From_VC25_10

En de job gaat op de afgesproken tijd lopen.

Export_VM_From_VC25_11

VMware: How to import a Standalone VM with Workstation 6.x


In deze post zie je hoe eenvoudig het is om een standalone VMware Workstation VM kun importeren naar je VMware Virtual Infrastructure omgeving.

Klik op ‘File’ en dan ‘Import…’

image

De volgende wizard start op.

image

Stap 1: de Source

image

Omdat ik een Stand Alone VM wil gaan importeren in mijn ESX omgeving kies ik voor ‘Other Virtual Machine’

image

Mocht het nodig zijn, dan kun je hier de Disk resizen

image

Stap 2: de Destination

image

Kies in het volgende scherm de optie ‘VMware Infrastructure Virtual Machine’

image

Vul de gegevens in van je VirtualCenter server.

image

Selecteer de Map waar de VM in moet worden geplaatst.

image

De volgende stappen spreken voor zich totdat het volgende scherm komt. Hier valt op dat je geen van de opties kunt selecteren. Dit komt omdat deze VM op linux is gebasseerd. Was dit een Windows VM geweest, dan kon je wel een keuze maken in dit scherm.

image

Even een kort overzicht van de gekozen opties

image

De VM word geïmporteerd.

image

Je kunt ook nog tegen de volgende foutmelding aanlopen:

image

Hadden ze dit niet aan het begin van de wizard kunnen melden :-S

Dit los je als volgt op: sluit het tabblad van de VM en start de wizard nogmaals.

VMware: Portability between VMware Workstation and VMware Server


Om VM’s die gemaakt zijn in Workstation 6 of hoger te kunnen gebruiken in VMware Server. Moet je de de Hardware version aanpassen.

Dit gaat als volgt. Open de VM in Workstation (versie 6 of hoger) en klik rechts op het tabblad. Daarna klik je op ‘Upgrade or Change Version…’

Change_VM_Hardware_Version

Zoals je ziet is deze VM gemaakt voor Workstaion 6. VMware Server (1.0x) kan hier niet mee overweg.

Change_VM_Hardware_Version_2

Pas deze aan naar ‘Workstation 5’.

Change_VM_Hardware_Version_3

Daarna kun je uit de volgende opties kiezen. Ik pas de huidige VM aan.

Change_VM_Hardware_Version_4

Change_VM_Hardware_Version_5

De conversie wordt uitgevoerd.

Change_VM_Hardware_Version_6

Nu kun je de VM kopieren naar VMware Server en opstarten.

VMware: Installing ESX3i in Workstation 6.5 beta build 91182


Na Eric zijn post over het installeren van ESX3.5 update 1 binnen VMware Workstation 6.5 beta. Wilde ik het ook weer eens proberen.

Als eerste maak je een VM aan in Workstation :

  • Als Guest operating system heb ik gekozen voor Red Hat Enterprise Linux 3
  • Mijn VMDK is 2GB en hangt aan de standaard LSI adapter
  • 1GB geheugen
  • CD-Rom drive
  • Single vCPU
  • 3x Intel 1000 nics (verderop lees je hoe je dit configureerd).


Nadat de VM is aangemaakt open je het vmx bestand en voeg de onderstaande parameters toe:

ethernet0.present = “TRUE”
ethernet0.wakeOnPcktRcv = “FALSE”
ethernet0.virtualDev = “e1000”
ethernet1.present = “TRUE”
ethernet1.wakeOnPcktRcv = “FALSE”
ethernet1.virtualDev = “e1000”
ethernet2.present = “TRUE”
ethernet2.wakeOnPcktRcv = “FALSE”
ethernet2.virtualDev = “e1000”

monitor.virtual_exec = “hardware”
monitor_control.restrict_backdoor = “true”


Ik wilde vervolgens ESX3i installeren en dat ging niet helemaal goed zoals je ziet:

image

Dit kwam omdat ik geen netwerkverbinding had op mijn host op het moment van installeren.

Nadat ik weer netwerkverbinding had met mijn host, kon ik ESX3i gewoon installeren.

image

VMware: ESX 3.5 running on Workstation 6.5 Build 91182


Wat het belangrijkste nieuws is, lees je inde volgende quote:

I contacted Keith Adams, he’s one of the WS 6.5 engineers and asked him he could confirm that we can use ESX 3.5 in the lasts build of VMware Workstation 6.5 and he confirmed :

Indeed, we’ve changed the nomenclature around. It’s now:
monitor.virtual_exec=”hardware”|”software”|”auto”
(Note: monitor, not monitor_control.)

For all guest os types:
hardware = VT on Intel, SVM on AMD
software = BT for all 32-bit guests, and on BT-capable 64-bit AMD hardware for 64-bit guests as well
auto     = Let us guess what to do (the default).

Lees de rest van zijn post hier.

Thanks Eric!

VMware: What VMware products support which VM OS?


Rich Brambley van vmetc.com heeft een tabel gemaakt over welk VMware product welk OS ondersteund. 

There are sections of installation instructions for every past and present operating system that is supported. What I am posting from this document is a very helpful table that is a quick reference of what VMware products support which VM operating systems. This table has been copied from the online version of the guide.

This table makes it very easy to answer questions like: 

  • Is a VM running Server 2008 supported on ESX?
  • Is Vista supported in VMware ACE?
  • Does VMware support running Solaris on VMware Server?
  • Can I run Windows ME or Windows 98 in an ESX guest?
  • Is Netware supported in VMware Workstation?

The answers to these questions along with every possible supported OS and VMware product combination can be found in this table:

http://vmetc.com/2008/05/05/what-vmware-products-support-which-vm-os/

VMware: Unable to open network mapping libary


De onderstaande foutmelding kan optreden als je een VM die aangemaakt is in VMware Server 2.0 Beta2 wilt gebruiken in VMware Workstation 6.x.

Ws_error

Dit kun je als volgt oplossen:

Open het VMX bestand en verwijder de volgende twee regeles:

ethernet0.features = “1”
ethernet0.networkName = “Bridged”


Bron voor deze oplossing is een post van jensent1 in het VMware forum: http://communities.vmware.com/thread/127124

Vmware: Show VMware Tools version with BGInfo


Ik denk dat de meeste van jullie de tool BGInfo wel kennen. Met deze tool kun je systeeminformatie tonen op de desktop. Ik wilde in onze VMware omgeving en ook in mijn Master VM’s het versie nummer tonen van VMware Tools. Dit kun je vrij eenvoudig doen in BGInfo.

Open BGInfo of je eigen *.bgi bestand. Klik daarna op ‘Custom..’ gevolgd door ‘New’. Geef nu een Identifier naam op. Daarna selecteer je ‘Version information for a file’. Als laatste browse je naar het bestand ‘VMwareService.exe’ en klik je op Ok..

Show_VMware_Tools_version_with_bginfo

Vanaf nu kun je VMware Tools version toevoegen aan je bgi bestand.

image

Nadat je het nieuwe *.bgi bestand hebt doorgevoerd, zie je vanaf dan het versie nummer van de VMware Tools. Je kunt het versie nummer controleren via het About scherm van de VMware Tools.

Hieronder zie je en printscreen van een VM in VMware Workstation.

image

In ESX 3.01 ziet het er zo uit:

image

VMware: What’s new in VMware Workstation 6.5 beta 1


Het nieuwe virtualmachine scherm. Let op de gepimpte icoontjes.

image

De nieuwe optie voor 3D graphics.

image

Meer informatie over de 3D graphics:

Support for Direct3D Graphics

To take advantage of the 3-D capabilities of Workstation, the virtual machine must be running the version of VMware Tools included with Workstation 6.5 or higher. For example, you do not need to upgrade a Workstation 6.0 virtual machine to Workstation 6.5, but you do need to upgrade the VMware Tools running inside it. If you move the virtual machine and want to use the 3-D capabilities, be sure you have the correct version of VMware Tools installed.

Support for applications that use DirectX 9 accelerated graphics applies only to Windows XP guests, on hosts running Windows 2000, Windows XP, Windows Vista, or Linux.


De snapshot en replay opties.

image

The replay control dialog box contains the following buttons:

  • Play/Pause – The button is labeled Play if you want to play the last recording you made for the selected virtual machine. If the virtual machine is powered off, it is resumed, as if it had been suspended. It is labeled Pause if you want to suspend the replay and click the button again to resume replay.
  • Go Live – Stops the replay that is in progress and reverts to the current state of the virtual machine.
  • Add Marker – Takes a replay-specific snapshot at the current location within the recording. You can use this marker during replay to skip ahead in a recording.
  • Go to Previous Marker – Plays the previous marker.
  • Go to Next Marker – Plays the next marker.
  • Current Replay Position Slider – Allows to preview a replay. You can drag and drop the Current Replay Position Slider to the nearest previous snapshot and start replaying. On Linux, the auto-scroll function of the zoomed in portion is enabled. The Current Replay Position Slider is a red arrow located in the progress timeline.
  • Zoom Control – Controls the zoom in and out function during replay.
  • Minimize – On Windows, the (-) button minimizes the dialog box to the bottom left hand side of the status bar. The minimized control allows you to view your recording in the virtual machine and use the controls in the status bar. The progress indicator in the status bar shows the timeline of the recording.
  • Note Keep in mind that you cannot close the replay control dialog box.

Replay Speed Control – Controls the replay speed of a recording. Click the right button to increase the replay speed to the maximum. Click the left button to decrease the replay speed to normal.

Note The speed of a playback depends on the host activity and workload of the guest.


Voor de replay functie dien je wel de Hardware compatibility te verhogen naar Workstation 6.5.

image

  Het upgraden van de VMware Tools heeft ook weer wat meer opties gekregen.

image

Bij het starten van de VM kwam de onderstaande melding.

image

Nadat je op Update Tools hebt gedruk krijg je netjes een uitleg over hoe je de upgrade uit kunt voeren.

image

Wat verder opvalt bij de Advanced settings zijn de volgende opties:

  1. Disable Acceleration
  2. Disable memory page trimming
  3. Log virtual machine progress periodically
  4. Enable Template mode (to be used for cloning)
  5. Enable VMware parvirtual kernel support

image


Later meer……