PowerCLI: Change VMware Tools Options


image

In this post you will learn how to change the VMware Tools settings in the Options menu which you can find in the vSphere Client:

image

You can enable or disable these features via the following PowerCLI script:

$vCenter = Read-Host "Enter vCenter Server name"

Connect-VIServer $vCenter

$vmConfigSpec = New-Object VMware.Vim.VirtualMachineConfigSpec
$vmConfigSpec.Tools = New-Object VMware.Vim.ToolsConfigInfo
$vmConfigSpec.Tools.AfterPowerOn = $true
$vmConfigSpec.Tools.AfterResume = $true
$vmConfigSpec.Tools.BeforeGuestStandby = $true
$vmConfigSpec.Tools.BeforeGuestShutdown = $true
$vmConfigSpec.Tools.SyncTimeWithHost = $true
$vmConfigSpec.Tools.ToolsUpgradePolicy = "Manual" # "UpgradeAtPowerCycle"

Get-VM | % { (Get-View $_.ID).ReconfigVM($vmConfigSpec)}

Disconnect-VIServer -Confirm:$false


Just change the $true values to $false if you want to disable the feature. If you want to change the Tools Upgrade Policy to Upgrade at startup just remove "Manual" # and it should change the Policy.

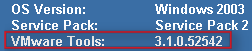
This is what you see when the VM is still active:

image image

This script will change the configured settings on All the VM’s.  If you want to change the settings on a particular VM just change Get-VM into Get-VM vmname

Advertisement

VMware Tools Registry settings


image

@vmdavinci asked the following on Twitter:

image 

These are the registry settings you can change:

If you want to disable the notify if upgrade is available warning:

[HKEY_CURRENT_USER\Software\VMware, Inc.\VMware Tools]
@=dword:00000000

If you want to hide the Tools icon change the following registry key:

[HKEY_CURRENT_USER\Software\VMware, Inc.\VMware Tools]
"ShowTray"=dword:00000001

Or

[HKEY_LOCAL_MACHINE\Software\VMware, Inc.\VMware Tools]
"ShowTray"=dword:00000001

Restart VMware Tools on all Windows VM’s


 image

After reading the post on http://www.virtualvcp.com/content/view/82/1/ about the VMware Tools status “not running” and in particular the part about the preferred work around:

I find that restarting the VMware Tools Service in the guest OS always gets by the problem, but loggin into every single VM that reports the wrong status for it’s VMware Tools could be a bit of a drag. So I choose to do this remotely rather that logging on to each VM.

From any Windows workstation/server, open a command pompt and run:

sc \\{vm-name-or-ip-address} stop "VMTools"
sc \\{vm-name-or-ip-address} start "VMTools"

I thought that can be done via Powershell and the VI Toolkit. So I created the following script that will restart the VMware Tools service on every running Windows VM.

$vCenter = Read-Host "Enter the vCenter servername"

Connect-VIServer $vCenter

$Service = "VMtools"
$VMs = Get-VM | Where-Object {
        $_.PowerState -eq "PoweredON" `
        -and `
        $_.Guest.OSFullName -match "Windows"
    }
    
foreach($VM in $VMs)
{
    Write-Host "-------------------------------------------"
    Write-Host "Restarting the VMware Tools Service on" $VM
        $Svc = Get-WmiObject -Computer $VM win32_service `
        -filter "name='$Service'"
            $Result = $Svc.StopService()
            sleep 5
            $Result = $Svc.StartService()
    Write-Host "Done.. "
    Write-Host "-------------------------------------------"
}

Disconnect-VIServer -Confirm:$false

This script generates the following output:

image

Other useful blog posts or kb articles on this subject:

Source for the restart service part in my script: http://blog.geekpoet.net/2008/10/manipulating-remote-services-with.html

Veeam: Snapshot creation failed: Could not quiesce file system


A couple of days ago, I was testing with Veeam backup and a new created VM. The backup stops with the following error:

image

In the Veeam Backup release notes (veeam_backup_2.0.1_release_notes.pdf) and the known errors section, you’ll find the following text:

If you attempt to backup a VM with VMware Tools VSS support module installed with Veeam Backup job having VSS option enabled, the backup would fail with the following error: VCB error: Error: Other error encountered: Snapshot creation failed: Could not quiesce file system. An error occurred, cleaning up…. To resolve this, disable VMware Tools quiescence in the backup job properties, or uninstall VSS support module.

So I checked de VM and uninstalled the VSS option.

Go to Control Panel –> Add/Remove Programs –> VMware Tools. The VMware Tools Setup starts and in this screen press modify.

image

Disable the VSS Support feature in the VMware Tools.

image

Finish the setup wizard and reboot the VM.


After a reboot, the following error might popup:

image

The fix was a little bit funny. When I pressed the right mouse button on My Computer or any other directory, the Symantec Antivirus installer starts with a repair job.

image

After the repair job is done and the VM is back online after a reboot, the VM acts normal again :-S

VMware: Set VMware TimeSync option with the VI Toolkit


Ik was vandaag even met Gabrie van Zanten (http://www.gabesvirtualworld.com/) aan het brainstormen over het aanpassen van de Time synchronization optie, binnen de VMware Tools via de VI Toolkit.

image

Dit is uiteindelijk gelukt (met een beetje hulp van Niket en LucD http://communities.vmware.com/message/1106816).

Je kunt het script op twee manieren gebruiken:

Het aan of uitzetten van deze optie op alle VM’s kan via het onderstaande script.

$vCenter = ”

Connect-VIServer $vCenter

[Reflection.Assembly]::LoadWithPartialName("vmware.vim")

$vmConfigSpec = New-Object VMware.Vim.VirtualMachineConfigSpec
$vmConfigSpec.Tools = New-Object VMware.Vim.ToolsConfigInfo
$vmConfigSpec.Tools.SyncTimeWithHost = $True (or $False if you want to disable it)

Get-VM | % { (Get-View $_.ID).ReconfigVM($vmConfigSpec)} # For al VMs

Disconnect-VIServer -Confirm:$False


Wil je dit op een specifieke VM uitvoeren dan gebruik je de volgende Get-VM regel:

Get-VM -Name $vmname | % { (Get-View $_.ID).ReconfigVM($vmConfigSpec)} # VM with name vmname.

Je moet alleen dan wel de variable $vmname aanmaken.

Via het volgende commando kun je de actie controleren.

Get-VM | Get-View | %{Write-Host $_.Name $_.Config.Tools.syncTimeWithHost}

Vmware: Show VMware Tools version with BGInfo


Ik denk dat de meeste van jullie de tool BGInfo wel kennen. Met deze tool kun je systeeminformatie tonen op de desktop. Ik wilde in onze VMware omgeving en ook in mijn Master VM’s het versie nummer tonen van VMware Tools. Dit kun je vrij eenvoudig doen in BGInfo.

Open BGInfo of je eigen *.bgi bestand. Klik daarna op ‘Custom..’ gevolgd door ‘New’. Geef nu een Identifier naam op. Daarna selecteer je ‘Version information for a file’. Als laatste browse je naar het bestand ‘VMwareService.exe’ en klik je op Ok..

Show_VMware_Tools_version_with_bginfo

Vanaf nu kun je VMware Tools version toevoegen aan je bgi bestand.

image

Nadat je het nieuwe *.bgi bestand hebt doorgevoerd, zie je vanaf dan het versie nummer van de VMware Tools. Je kunt het versie nummer controleren via het About scherm van de VMware Tools.

Hieronder zie je en printscreen van een VM in VMware Workstation.

image

In ESX 3.01 ziet het er zo uit:

image

Tool: RVTools


Rob de Veij poste een handige tool op het forum van vmug. De tool heet RVTools en hiermee is het mogelijk om via een ESX server of via een VC server de status van de VMware Tools uit te lezen.

Hieronder zie je een printscreen van de tool:

rvtools 

De onderstaande informatie vind je op de website van RVTools:

RVTools is a small .NET 2.0 application which uses the VI SDK  to display  the version of the installed VMware tools.
It also shows if the tools are upgradeable. The button “Upgrade VMware Tools” starts an UpgradeTools_Task for every selected VM.

Je kunt de tool hier downloaden: http://rvtools.deveij.com/ 

Update: de site lijkt niet goed te werken in IE7. Mocht je problemen hebben (stap dan over op firefox 😉 ), dan vind je hier de direct downloadlink: http://home.planet.nl/~veij0002/RVTools.msi.

Error Joining Domain: The Endpoint format is invalid.


Ik had een VM binnen VMware Workstation opgebouwd. Deze heb ik daarna via de VMware Converter overgezet naar mijn ESX omgeving met het vinkje: Install VMware Tools.

Door deze optie treed er een fout op binnen de VMWare Tools waardoor ik de volgende foutmelding kreeg bij het Joinen van het domein.

joindomain error

De oplossing vond ik op de blog van david hochstaetter. Het is vrij simpel. De VMWare Tools deïnstalleren. De VM opnieuw opstarten. Toevoegen aan het domein. Vervolgens de VM weer opnieuw opstarten. En als laatste installeer je de VMware Tools weer.

VMWare: Install VMWare Tools on Windows Server 2008 Core


Ik zag de volgende post op de blog van Mike Laverick: http://www.rtfm-ed.co.uk/?p=451. In deze post word door Michael Maher word uitgelegd hoe je de VMware Tools kunt installeren in een Windows Server 2008 Core VM.

“For those unfamiliar with Server Core it is a command line only version of Windows Server 2008 (formerly Longhorn). I have been trying to install this on ESX 3.0. On the GUI version of Windows 2008 server, VMWare tools must be installed to get the NIC working. Server Core however is command line only. VMWareTools is a GUI installation so this is not an option for Server Core. The workaround is to transfer VMWareTools (contained in a file called windows.iso) from your ESX server to a local drive. This can be done using Winscp. Use Virtual Center to mount the windows.iso file as a CDROM drive in the Server Core VM. The driver files are located in \Program Files\VMWare\VMWare Tools\Drivers\VMXNet\w2k of the windows.iso file. The command used to install the drivers is

C:\Windows\System32>pnputil -i -a vmxnet.inf
Microsoft PnP Utility
Processing inf : vmxnet.inf
Successfully installed the driver on a device on the system.
Driver package added successfully.
Published name : oem2.inf

Next check the installation of the driver. Vmxnet should be displayed near the end of the list.

C:\Windows\System32>driverquery
ws2ifsl Winsock IFS driver Kernel 18/04/2007 04:52:40
vmxnet VMware Ethernet Adapte Kernel 22/04/2006 23:13:11

You can then enable remote access of Server Core with the command.


netsh advfirewall set allprofiles settings remotemanagement enable

To disable the firewall.
netsh advfirewall set allprofiles firewallpolicy allowinbound,allowoutbound”

In post word ook nog verwezen naar een ander blog van Justin Campbell. Daar vind je nog meer info over Server 2008 Core: http://cmsjustin.blogspot.com/2007/09/windows-server-2008-core-not-what-i-had.html